Process:1. PLANNING
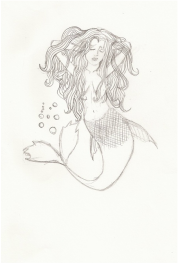
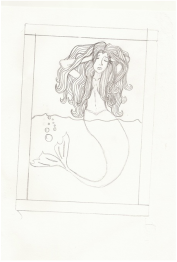
In order to be able to create something for my drypoint, the planning process was a lot better. Although I normally first need to come up with what I'm going to do, this time I already knew. I still needed to do the sketches for my ideas since I needed to combine two different things into one single thing. MY SKETCHES:
2. START ETCHING:
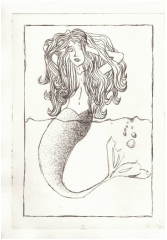
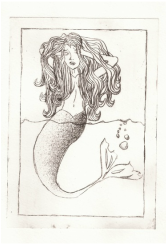
Once I got my final sketch, which I drew to the size of the plastic plate, I just taped the plate on top of my sketch and began to inscribe. This was the easiest and most efficient way to do it. Especially since I had quite a bit of detail, I wanted to make sure that I didn't miss a bit of it. With my previous sketch I realized that cross hatching didn't look too good for shading, so I did stippling for my actual piece and I did it without a guide. I tapped the plate continuously until I felt like there was enough. I wanted to create a gradient of which would be darker on the inside. FINAL RESULT: 
3. BEGIN PRINTING!
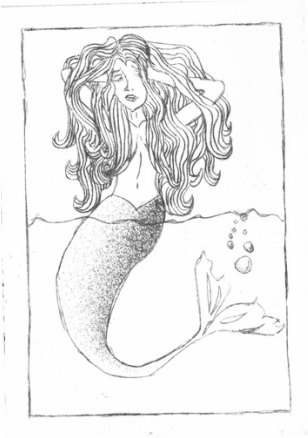
The printing process for the dry point print is very messy. First, I needed place my paper into a bucket of water for 7-8 min. Then, I had to add the ink onto the plate. This process was very confusing since I wasn't sure how much ink to add or how much was too much, or too little. After adding the ink, I had to remove the ink with newspaper. Again, I wasn't sure how much I should've removed or not. By the time that is done, the paper was done and I began the actual printing. I put the print and paper into this presser and hoped for the best as I rolled it out. My first print was very successful! However, I wanted to make sure if there was a better print to come, so I did it again. My second print came out very good as well. Therefore, it was a hard decision to make. MY TWO ONLY PRINTS:
|
"LA SIRENA"
|
|
For the dry point print, one can do more detail into the design so that's exactly what I did. I wanted to continue the "La Loteria" theme for this print as well so that they could somewhat connect so I made them into a series. Therefore, this print is also inspire by my childhood game. However, due to the fact that a lot more detail could be added, that meant that I needed to pick another card from the game that had a lot more detail than a simple one, like the one I used for my block print. That is why I chose the mermaid. Aside from that reason, during class we were told that the theme of fantasy works very with the dry point print. Once I picked my card, I wanted to find something else that I could relate my piece to. So I began to think of different art movements. I initially began to think of Art Nouveau and I was convinced. An artist like Alphonse Mucha, who makes women look like amazing pieces of art was what I needed to base this off of. That is why I tried to incorporate the majestic hair that the woman in his work "Job" has going on. I just knew i needed to incorporate it.
|
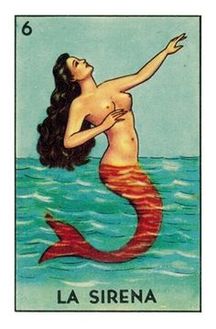
La, Loteria. "La Sirena." Web. 14 Dec. 2015.
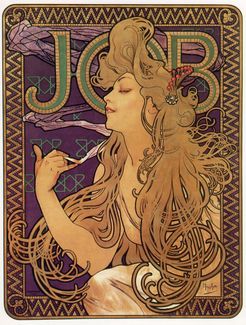
Mucha, Alphonse. "Job." Web. 14 Dec. 2015.
|
Meaning of piece:
A mermaid is normally portrayed as an over sexualized woman. Also, they are known to be very attractive, almost mesmerizing. They are very powerful creatures which are normally known to attack or distract men at sea. Therefore, the meaning of this piece is simply a women not being able to take it anymore. After so long of listening to the same thing, even a strong one could break. This mermaid is tired. She, like many people, have been put to such high expectations of which they are tired of listening to . That is why the mermaid in my print has her eyes closed and has her eyes covered as well. In the playing card, the mermaid's breasts are out. However, I felt that if i were to cover them, she would look more vulnerable. Almost as if she's trying to hide. Sometimes getting tired of something just makes you want to disappear. That is what inspired my mermaid to express a feeling, rather than looking strong and ready for the next big wave.
Reflection:
This was one of my most successful pieces yet. I enjoyed sketching for it, and even printing it. I was able to end with a great print. I really liked my idea of stippling instead of cross hatching, it definitely added that bit of detail that it was lacking of on the final sketch. I also liked how the hair looked and the way that it also resembled Mucha's work. Overall, it was a great experience. I'm just glad that after the block print I was able to redeem myself.
Tools:
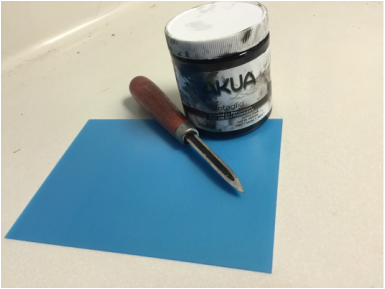
- Ink (oil base)
- Plexiglass Plate (used to create the print in)
- Inscriber (used to inscribe the design into the plexiglass plate)
